You can send campaigns from inboxes you already own, on every plan, Free included. Connecting them is free. This guide shows which inboxes work, the one-time approval Google or Microsoft may ask for, and how to connect an inbox and use it in a campaign.
Which inboxes work
- An inbox on a separate sending domain works. For example
[email protected]when your company runs onacme.com. - Your main domain can't send campaigns. Kenso keeps it out of cold email, so your team's everyday email and invoices never land in spam. Your main domains are the ones listed in Settings › Company › Websites and domains. An inbox on one of them connects as your own inbox for one-to-one email instead. See Connect your mailbox and LinkedIn.
- Each sender is its own mailbox. Kenso sends as the account you sign in with. It doesn't send from that account's aliases or "Send mail as" addresses.
- Subdomains work, but share reputation. An inbox on
mail.acme.comcan send, but its reputation is tied toacme.com. A separate domain is safer. See Set up sending domains and check their DNS.
Step 1: Approve Kenso Mail once
Campaign inboxes connect through Kenso's app Kenso Mail. Many Google Workspace and Microsoft 365 accounts only allow apps an admin has approved. Without that approval, Google shows a warning or blocks the sign-in, and Microsoft says admin approval is required.
An admin approves Kenso Mail once for the whole company. It takes about 2 minutes. SMTP inboxes skip this step.
Google Workspace
- Sign in to the Google Admin console as an admin.
- Go to Security › Access and data control › API controls and click Manage App Access.
- Click Configure new app and search for Kenso Mail's client ID:
874038817692-43lre92i6bidpr49bkev5laj9vjneqld.apps.googleusercontent.com - Click the app. Google lists it as Kenso.
- Keep the top org unit and click Continue.
- Choose Trusted, click Continue, then Finish.
Microsoft 365
An admin opens the Microsoft 365 part of the admin guide and approves Kenso Mail with its consent button.
Step 2: Connect the inbox
-
Open Delivery in the sidebar, or press G then D, and open the Inboxes tab.
-
Click Add inboxes at the top right.
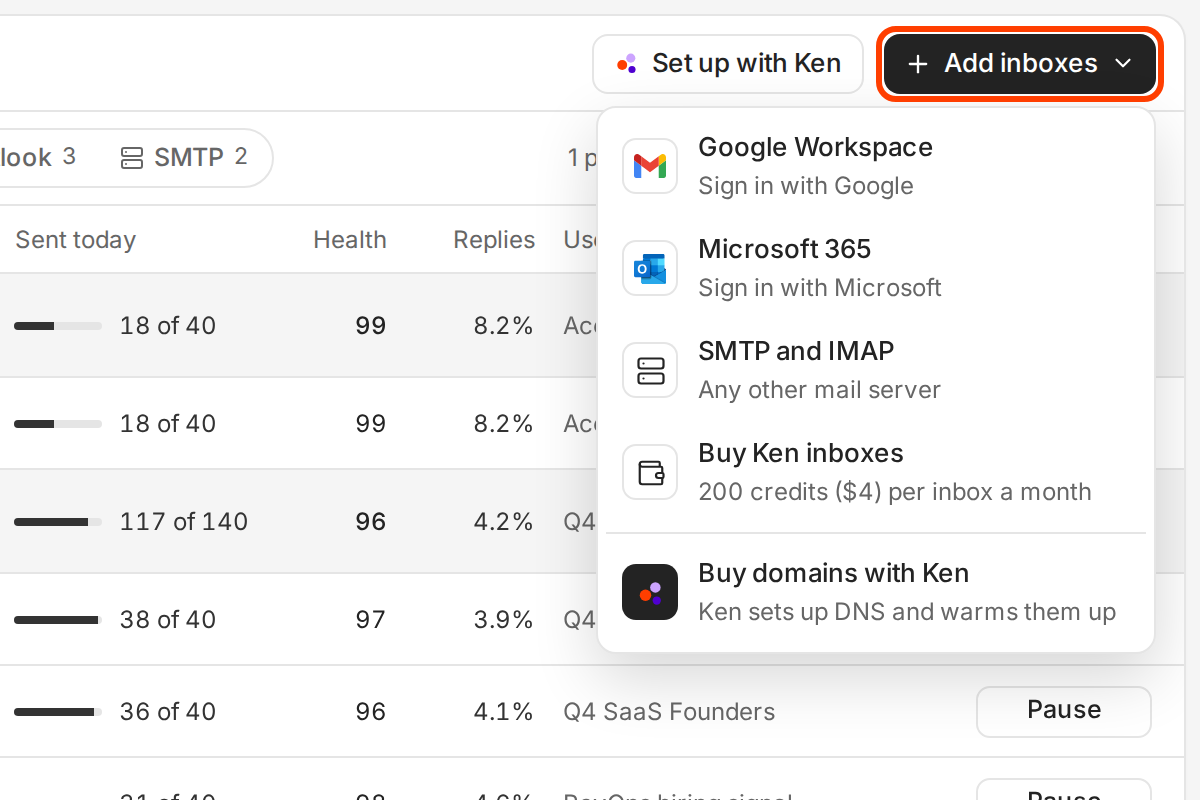
Connect an inbox you have, or buy new ones from Kenso. -
Pick Google Workspace or Microsoft 365. Kenso opens Google's or Microsoft's sign-in right away.
-
Sign in as the inbox you want to send from and allow access. Kenso brings you back to Delivery, where the inbox now shows.
For any other mail server, pick SMTP and IMAP, fill in the server details and click Connect inbox.
Step 3: Add it to a campaign
- In Delivery, tick the inbox's checkbox.
- Click Add to campaign in the bar that appears and pick the campaign.
A campaign needs at least one sending inbox before it can launch. If the inbox is new, let it warm up first. See How warm-up works.
If Kenso refuses the inbox
- Kenso says it keeps your primary domain out of cold email. The inbox is on one of your main domains. Use an inbox on a separate sending domain.
- A banner says the workspace has reached its limit of Gmail and Outlook mailboxes. On the Free plan you can connect up to 3 inboxes with Google or Microsoft sign-in. Connect more with SMTP and IMAP, or contact support. See Send campaigns on the Free plan.
- Google or Microsoft blocks the sign-in. Your admin hasn't approved Kenso Mail yet, or Google hasn't applied it. See Step 1.