
The leads grid and bulk actions
Browse, filter, and act on every contact in a campaign - and open a full contact detail sheet with one click.
Overview
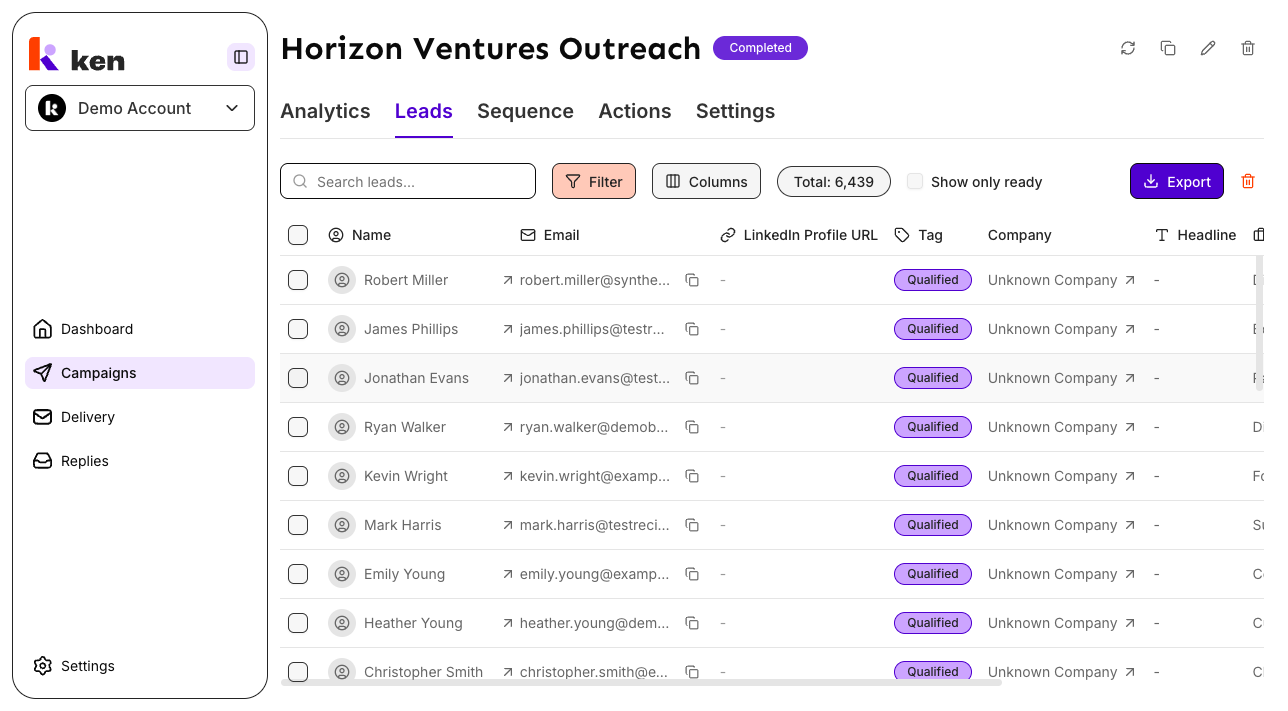
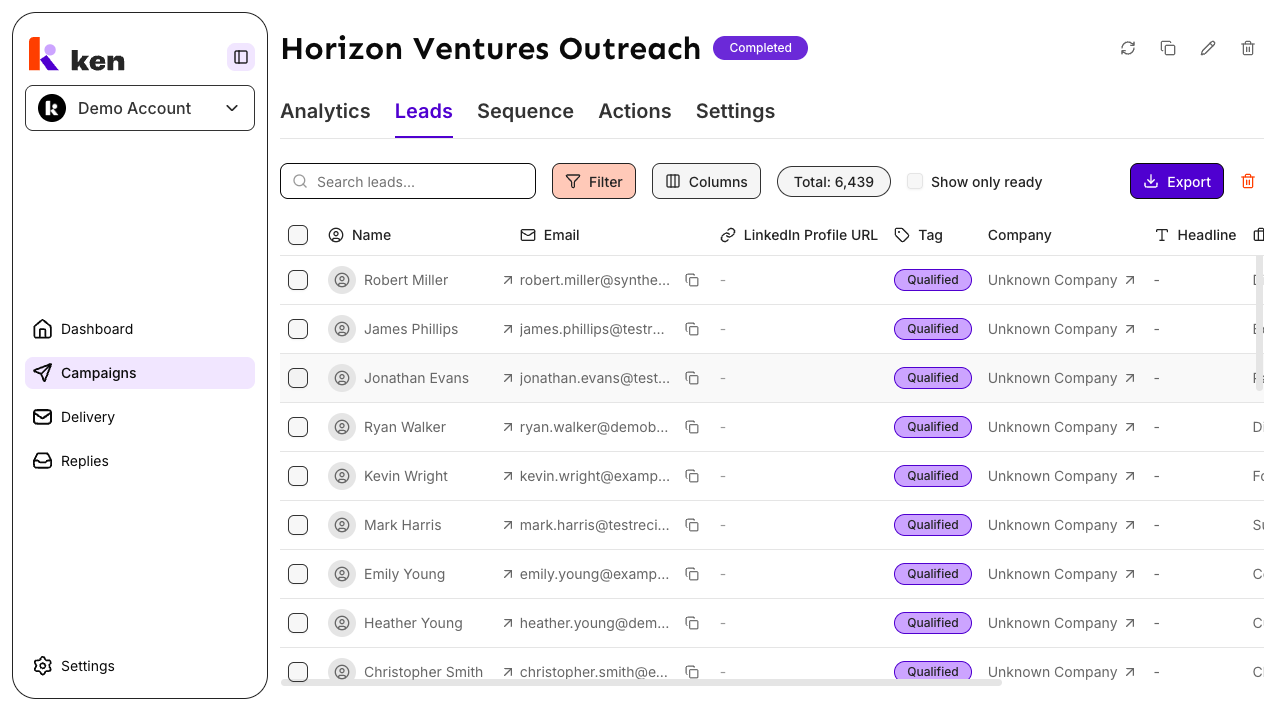
The leads grid is the table you see when you open a campaign and click the Leads tab. It lists every contact that has been added to the campaign, shows their core profile fields and engagement statistics, and lets you search, filter, export, and delete contacts in bulk.
The grid is designed around a single guarantee: what you see is exactly what you export or delete. The same filters that narrow the visible rows also scope every bulk action, so there is no silent mismatch between the table and the CSV file in your downloads folder.
Where to find it: Open any campaign from the sidebar under Campaigns, then click the Leads tab.
Before you start
- You must be a member of the workspace that owns the campaign. Access is verified against your account on every request - you cannot view or act on leads belonging to a different workspace.
- Export and delete actions require the same membership. There is no separate export-only role.
How to use the leads grid
Step 1 - Open the Leads tab
- Click Campaigns in the left sidebar.
- Click the name of the campaign you want to inspect.
- Click Leads in the campaign tab bar (next to Analytics, Sequence, Actions, Settings).
The grid loads the first page of contacts automatically. A progress bar is shown while the initial data is fetching.
Step 2 - Search and filter
Search by name or email: Type in the Search leads... box. Results update after a short pause (300 ms). Searching by email address uses an exact-match path; searching by company name uses a targeted index lookup. Both are designed to avoid full-table scans.
Filter by field: Click Filter to open the filter panel. You can stack multiple AND/OR rule groups covering qualification status, segment, email validity, engagement stats, location, and more. A blue badge on the Filter button shows how many active filter rules are applied. Click Filter again to edit or clear them.
Show only ready contacts: Check Show only ready to restrict the grid to contacts that are ready for outreach. This toggle applies to the grid display and to any export or delete action you run while it is active.
Toggle columns: Click Columns to open the column picker. Search inside the picker to find a specific column, then check or uncheck to show or hide it. Hidden columns are excluded from CSV exports.
The Total: counter in the toolbar shows the number of contacts matching your current search and filters. It stays stable during refetches so it does not flicker on every keystroke.
Step 3 - Read long cell values
Many columns - AI-personalization lines, qualification responses, company descriptions - contain text too long to fit in a fixed-width cell. When text is clipped, the cell becomes clickable. Click a clipped cell to open a scrollable popover showing the full value. Cells whose text already fits have no click behavior.
Step 4 - Open the contact detail sheet
Click anywhere on a row's name cell (or the expand action in the row) to open the Contact detail sheet. The sheet slides in from the right without leaving the page.
The sheet is organized into sections:
- Status - outreach status tags for this contact
- Email Conversation - the full inbound/outbound email thread, sorted by date
- Contact Details - name, email, email validity, title, headline, location, seniority, LinkedIn URL, tag, qualification status, segment, and extended profile fields
- Company - company name, domain, industry, size, location, headquarters, and enrichment data
- Phone - phone number and validity if available
- Qualification - the AI qualification response for this contact
- Statistics - emails sent, opens, clicks, replies, unsubscribes, bounces, positive replies
- Website - scraped website data if available
- AI Personalization - the AI-generated output for each personalization variable configured on the campaign sequence (only shown when at least one value is present)
Use the Search field box inside the sheet to filter which fields are shown.
Close the sheet by clicking the X button or pressing Escape.
Step 5 - Export to CSV
- Optionally apply search, filters, and the "Show only ready" toggle to scope the export.
- Click Export (the blue button with a download icon).
- The server checks the matching row count before building the file. If the count exceeds the 50,000-row export limit, the request is rejected with a message prompting you to narrow your filters. If the count is within limits, the export proceeds.
- A progress toast tracks elapsed time. When the file is ready, the browser downloads it automatically as a
.csvfile (namedleads_export_<timestamp>.csv).
The CSV contains only the columns that are currently visible in the grid. Hiding a column before exporting removes it from the file. Column headers use display names, not internal field keys.
Export limit: Exports are capped at 50,000 rows. If your filtered set exceeds this limit, narrow your filters and export in batches.
Step 6 - Delete contacts
Delete one contact: Click the trash icon that appears on hover in a row, then confirm in the dialog.
Delete selected contacts:
- Check the checkbox at the start of each row you want to delete, or check the header checkbox to select all loaded rows.
- If more rows exist beyond what is loaded (infinite scroll), a banner appears offering to extend the selection to all matching contacts in the current view. Click the link in the banner to select all matching contacts.
- Click the trash icon button in the toolbar (top right of the grid).
- For bulk deletes affecting more than one contact, type the campaign name in the confirmation dialog to proceed.
Important: The "Show only ready" option for bulk delete requires exactly one campaign to be in scope. If you trigger a ready-only bulk delete without a single campaign selected, the server rejects the request with a validation error rather than silently acting on a wider set. Custom filters can be used together with bulk delete; they do not block it.
Deleted contacts are soft-deleted - they are flagged as removed at the data layer but not physically erased. This cannot be undone from the UI.
How it works
The leads grid fetches data from the backend using a POST request rather than a GET. This is because filter rules can be arbitrarily nested (AND/OR groups with multiple conditions) and that structure does not fit in a URL query string.
Every page fetch and the matching row count run in parallel on the server, so the total shown in the toolbar is always consistent with the rows on screen - not a stale estimate from a prior query.
Column selection is sent to the server as part of each page request. The POST body includes the list of visible columns, and the server returns only those columns for each row. Toggling a column in the picker marks it for inclusion or exclusion in the next fetch.
The export and delete endpoints share the same filter criteria object as the grid. The server validates and applies filters identically for all three operations. When "Show only ready" is active, the ready-contact filter is applied before any pagination or offset, so a page of results and a bulk delete both draw from the same ready subset.
The contact detail sheet fetches the email conversation thread separately when it opens. The thread is sorted by date (oldest first). Outbound messages are shown on a light orange background; inbound replies are shown on white.
Long cell values in the grid are handled by an overflow measurement: after each render, the cell compares its visible width against its full content width. Only cells where text is genuinely clipped become clickable. The measurement is also re-run on hover so it stays accurate when column widths change.
All table state (search, filters, column visibility, scroll position) is local to the page session. Refreshing the page resets the grid to its default state.
Troubleshooting & debugging
Symptom: "Failed to load leads" error on the Leads tab
- Likely cause: a transient network error or backend timeout.
- What to check: Click the Retry button that appears in the error state. If the error persists, check the browser network tab for the
/v1/leadsPOST response. A 401 means the session has expired - sign in again. A 500 means a backend error; check server logs.
Symptom: The Total counter shows 0 but leads are expected
- Likely cause: a search term or filter is active that matches nothing.
- What to check: Look at the Filter badge for a non-zero count and the search box for any text. Click Clear filters or Clear search in the empty state, or use Show all leads to remove the "Show only ready" filter.
Symptom: Export is rejected with "narrow your filters" or a row-count error
- Likely cause: the filtered set exceeds the 50,000-row export limit. The server counts matching rows before building the CSV and rejects the request early rather than attempting an unbounded export.
- What to fix: Apply additional filters or use "Show only ready" to reduce the matching set below 50,000 rows, then export in multiple scoped batches.
Symptom: Export downloads an empty CSV or shows "no leads matched"
- Likely cause: the active search or filters match zero rows, or the "Show only ready" toggle is on and no contacts are in a ready state.
- What to check: Clear all active filters and retry. The toast message will tell you the row count - "Export finished, but no leads matched your filters" confirms a zero-row result.
Symptom: Export is blocked by "Your browser blocked the download"
- Likely cause: the browser's download blocker is preventing a programmatic file save triggered by a button click.
- What to fix: Allow downloads from this site in the browser's settings, then click Export again.
Symptom: Export fails with "Please sign in again" or "You do not have permission"
- Likely cause: the session has expired or the user's workspace membership was revoked.
- What to fix: Sign out and sign back in. If the error is a permissions error, verify the user's membership in the workspace settings.
Symptom: Bulk delete with "Show only ready" is rejected with a validation error
- Likely cause: "Show only ready" bulk delete requires exactly one campaign to be in scope. Without a single campaign, the backend cannot safely compute the ready set and refuses the request rather than acting on an unintended wider population.
- What to fix: Ensure you have exactly one campaign selected when running a ready-only bulk delete. Custom filters alongside ready-only are fine; the scoping error is specifically about the campaign count, not the filter complexity.
Symptom: Delete count reported by the server differs from the number of rows selected
- Likely cause: for ready-only bulk deletes, the server locks the ready set inside a serializable transaction and chunks deletes in batches. Rows that became ineligible between the grid load and the delete commit will not be included in the deleted count.
- What happens: The grid refreshes after the delete and shows the count returned by the server. If the numbers do not match what you expected, reload the grid and verify the current contact count.
Symptom: Email Conversation section in the detail sheet shows "Failed to load conversation"
- Likely cause: a transient error fetching the email thread for this contact.
- What to check: Close and reopen the detail sheet to retry the thread fetch. If the error persists, check the browser network tab for the email thread request.
Symptom: Contact detail sheet shows no AI Personalization section
- Likely cause: the campaign sequence has no AI variables configured, or none of the personalization values have been generated for this contact.
- This is expected behavior - the section only appears when at least one non-empty personalization value is present.
FAQ
Can I export only some of the columns? Yes. Use the Columns picker to hide any columns you do not need before clicking Export. The CSV will contain only the visible columns.
What does "Show only ready" mean? It filters the grid to contacts that are cleared for outreach - contacts that have passed verification and are not excluded by any blocking condition. The exact criteria are evaluated on the server. Enabling this toggle also scopes any export or delete you run while it is active.
Is there a row limit on the grid? The grid loads 25 rows at a time and appends more rows as you scroll down (infinite scroll). There is no hard cap on how many rows you can browse. Exports are capped at 50,000 rows.
Can I undo a delete? No. Deletes cannot be undone from the UI. Contacts are soft-deleted at the data layer, but restoring them requires direct database access by the platform team.
Why does the total count sometimes show "..." briefly? The total is fetched as part of each page load. To avoid the counter flickering on every keystroke while you type a search query, the grid holds the previous committed total until the new fetch completes. You will only see "..." on the very first load before any count has been returned.
Can I share a filtered view with a teammate? Currently the leads grid state (search text, active filters, column visibility) is not stored in the URL. You cannot share a pre-filtered view via a link. Your teammate would need to apply the same filters manually.