
Create a campaign manually
Use the creation wizard to set up a campaign step by step when you are not using the AI builder.
Overview
The campaign creation wizard is the starting point for every new campaign in Ken AI. When you choose the manual path, you give the campaign a name and a contact target, then land directly in the campaign's Actions hub to complete the rest of the setup at your own pace.
Find it at Campaigns in the left sidebar. If you have no campaigns yet, the page shows an empty state with a "Create your first campaign" prompt. If you already have campaigns, the wizard opens when you click Create new campaign at the top right of the campaigns list.
Before you start
- You must have an active Ken AI workspace with at least one client assigned.
- Creating a campaign consumes lead credits equal to the contact count you set. Check your remaining balance in Settings - Billing before creating a large campaign. The contact count cannot be changed after processing starts.
- No special role is required beyond workspace access.
How to create a campaign manually
Step 1 - Open the wizard
Navigate to Campaigns in the sidebar.
- If this is your first campaign, click the Create new campaign button in the empty state.
- If you already have campaigns, click the Create new campaign button at the top right of the campaigns list.
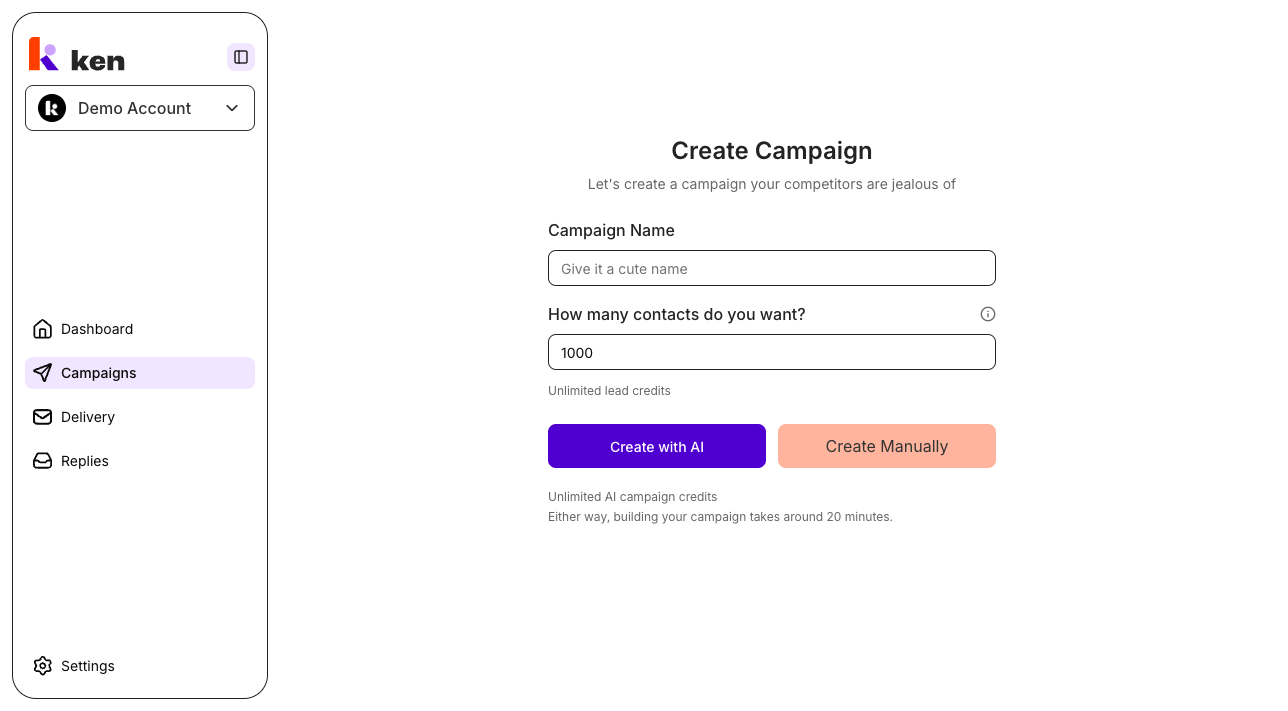
The wizard opens on a centered screen titled Create Campaign.
Step 2 - Name the campaign
In the Campaign Name field, type a name for this campaign. The placeholder text reads "Give it a cute name" - but use a name that is descriptive enough for you and your team to identify the campaign later.
Step 3 - Set the contact count
In the How many contacts do you want? field, enter the maximum number of contacts this campaign will send to. The default is 1,000.
Important limits to know:
- The field is capped at your remaining lead credit balance. If you have 3,000 lead credits left, you cannot enter more than 3,000.
- This value cannot be changed once the campaign starts processing.
- A credit hint below the field shows how many lead credits this count will consume.
Step 4 - Click "Create Manually"
Click the Create Manually button (the lighter button on the right). The button shows a spinner and the label "Creating..." while the campaign is being saved.
You will be redirected to the campaign's detail page, opened at the Actions tab. The campaign is now a Draft and is ready for you to configure its targeting, email sequences, sender accounts, and other settings from within the Actions hub.
Note: The Create with AI button on the same screen starts the AI-assisted build flow instead. That path is covered in a separate article.
How it works
When you click Create Manually, the wizard sends only two values to the platform: the campaign name and the contact limit. The campaign is created immediately as a Draft with no persona, goals, call-to-action, data source, or segments attached - those fields all default to empty.
Because there is nothing else to configure in the wizard at this point, the platform skips all further wizard steps and navigates you straight to the campaign's Actions tab. The Actions tab is the hub where you finish the setup: adding email sequences, assigning sender accounts, importing or searching for contacts, and reviewing the start-readiness checklist before you launch.
All of the wizard state (the name and contact count you typed) lives in the browser only until that final click. If you navigate away before clicking either button, the wizard detects unsaved state and shows a confirmation dialog asking whether you want to leave. Nothing is saved to the backend until you click one of the two create buttons.
Partial-success behavior
If the campaign is created successfully but a background step fails (for example, a segment could not be saved), the platform still creates the campaign and redirects you normally. A warning toast appears for each item that did not save. You can re-apply the missing configuration from inside the campaign.
Troubleshooting & debugging
Symptom: "Create Manually" button is disabled and cannot be clicked.
- Likely cause: The other button ("Create with AI") is also in a loading state, or the form has a validation error.
- What to check: Look for a red error message below the form fields. Ensure Campaign Name is not empty and that the contact count is a valid number greater than zero.
Symptom: Error message appears after clicking "Create Manually".
- Likely cause: A server-side failure while creating the campaign, usually a network error or a missing client context.
- What to check: Confirm you are connected to the internet and that your workspace is fully set up (a valid client must be assigned to your account). Refresh the page and try again. If the error persists, check the platform status page or contact support with the exact error text shown on screen.
Symptom: The contact count field resets to a lower value after the page loads.
- Likely cause: Your lead credit balance loaded and is lower than the default (1,000). The field automatically clamps to your remaining balance.
- What to check: Go to Settings - Billing to see your current lead credit balance. Top up if needed, then return to create the campaign.
Symptom: After clicking "Create Manually", the page stays on the wizard and nothing happens.
- Likely cause: A JavaScript error prevented navigation, or the network request timed out.
- What to check: Open the browser developer console for errors. Reload the page. If the campaign was partially created, check the campaigns list - the draft may already exist there even if the redirect failed.
Symptom: Navigating away from the wizard discarded the campaign name I typed.
- Expected behavior: If you click away before submitting, the wizard shows an unsaved-changes dialog. If you confirmed the navigation, the data is gone because nothing is saved to the backend until you click a create button. Re-open the wizard and type the name again.
Symptom: The contact count is capped at a very low number (e.g. 500) even though I expect more.
- Likely cause: Your remaining lead credit balance is low.
- What to check: Settings - Billing shows your current lead credit balance. The field max is
min(remaining lead credits, platform import limit).
FAQ
Can I change the contact count after creating the campaign? No. The contact limit is locked once campaign processing starts. Plan the target before you create the campaign.
What is the difference between "Create Manually" and "Create with AI"? "Create Manually" creates a bare Draft and takes you to the Actions hub to configure everything yourself. "Create with AI" creates a Draft and opens the AI campaign builder, which guides you through research, copywriting, and segment generation via a conversational interface.
What happens if I close the browser tab mid-wizard? Nothing is saved to the backend until you click a create button. Closing the tab before that point discards everything you typed. The unsaved-changes dialog only appears for in-page navigation, not for tab or window closes.
Where do I go after clicking "Create Manually"? You land on the campaign detail page at the Actions tab. This is where you add email sequences, assign sender accounts, import or find contacts, and check campaign readiness before launching.
Can I rename a campaign after creating it? Yes. Open the campaign, go to its settings or detail view, and update the name from there.
What is the maximum number of contacts I can set? The maximum is the lower of your remaining lead credit balance and the platform import limit. If your plan is on Unlimited leads, the cap is the platform import limit. The exact cap is enforced live in the contact count field.